
Submit Sitemap to Google Search Console
While we create a website, one of the maximum commonplace issues we have to deal with is how to listing the website online in search engines like Google.
5 minutes read
While we create a website, one of the maximum commonplace issues we have to deal with is how to listing the website online in search engines like Google.
5 minutes read
Author:
Hakeem Shah
Updated:
December 05, 2025
While we create a website, one of the most common issues we have to deal with is how to list the website online in search engines like Google.
Whenever I talk to newcomers who are not aware about how the search engine works, they assume that they need to pay Google or different search engines like Google and Yahoo to list their website. That is not true, of course. You can display your website in a Google search for free. The only thing you need to work on is helping Google to find your blog.
I have already shared my case-study on how to index your new website in 24 hours, and in this guide I will talk specifically about filing your sitemap to Google Search Console.
Google Search Console (formerly Google Webmaster Tools) is a free tool that lets you manage your website from the search engine's perspective. I will not go into detail about GWT here as I have already covered it in previous posts. In case you missed it, here is the primary article to get you started.
A sitemap is an XML file that consists of the URLs inside your blog. This file allows crawlers to discover all of the URLs of your blog. There are numerous aspects of your website that a crawler will follow, including the size of your sitemap and the number of URLs in your sitemap. In short, a sitemap is a complete index of your blog which you want search engine bots to see.
This wiki article on sitemaps will provide more technical and historical information.
Simply put, a sitemap file contains all the URLs of your blog, and you submit that file to search engines so they know about all of the pages of your blog. Search engine bots follow sitemap files to crawl and index your website.
You can learn more about crawling and indexing in further resources.
For a normal website, we use a web sitemap generator to create a sitemap file and publish it to webmaster tools provided by Google and Bing. For WordPress blogs, we use plugins that automatically keep updating our sitemap file as we publish new posts. This way, you do not need to resubmit a new sitemap after publishing new articles.
It is a good practice to place your sitemap file link in the footer of your website so that search engine bots can quickly find and follow the sitemap file and crawl your blog more efficiently.
Sitemaps can be generated in different ways depending on the platform you are using for your website. For example, WordPress sitemaps can be easily generated using the popular SEO plugin Yoast SEO.
For other platforms like static sites, there are many online tools and offline programs that assist with sitemap generation. For the purpose of this post, I will assume you know how to generate a sitemap and we will now see how to submit that sitemap to Google.
When we submit a sitemap to Google, we do that using the Search Console tool. Assuming that you have already verified your site in Google Search Console and you have logged into your Webmaster Tools dashboard, you have your sitemap link ready. If you used an offline tool to generate your sitemap, upload it to the root of your site like this: /sitemap.xml.
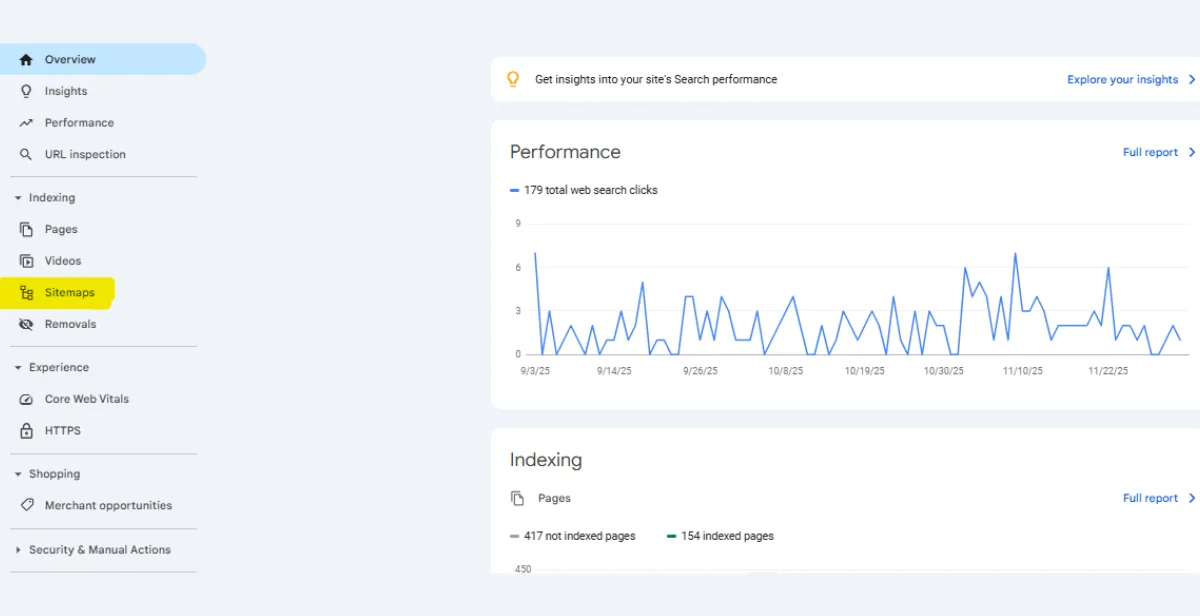
Inside your Google Webmaster Tools dashboard, at the right-hand side you will see a section called Sitemaps. Click to view all submitted sitemaps, or submit a new sitemap from there.
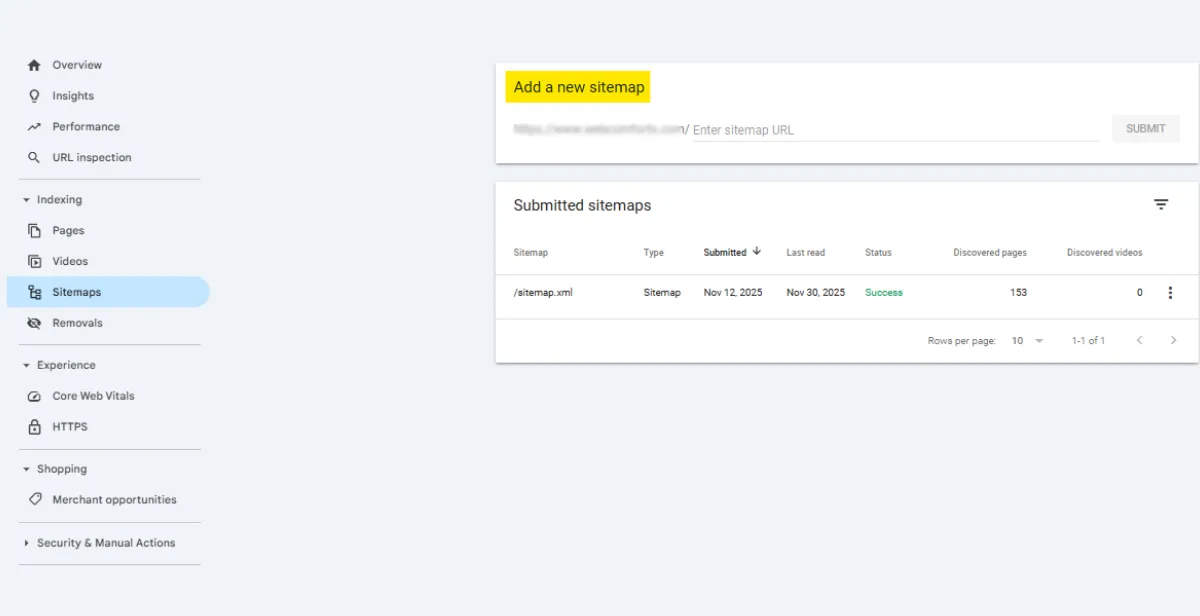
Depending on what kind of sitemap you have generated, you may submit it from the Sitemaps section. If you run a site with lots of images, I recommend creating an image sitemap, as discussed in image SEO articles. You can also create a video sitemap. For WordPress, you can generate image sitemaps using plugins.
When you submit a sitemap for a new blog it may take some time to see the index status. In the index status page, you can see how many URLs were submitted via the sitemap and how many links Google has indexed. If you submitted separate sitemaps for images and videos, you will see the status for those as well.
Make sure your sitemap file is placed in a public, crawlable location (for example https://example.com/sitemap.xml) and referenced in your robots.txt if you wish. For WordPress sites, plugins usually handle this automatically.
If you found this post useful, please share it with your friends on social media, Facebook groups, Google+ groups, or other platforms.


No comments yet. Be the first to post!